OK. We got Sprites. We got Backgrounds. What else?
I hear that the third (and final) graphical layer is “Window”. So a bit of reading and that looks like it’s useful for HUD style content (to save sprites – the Game Boy can only display 12 of those in any row). Out-of-the-box it starts at the top left of the screen but while reading up I found some clever shenanigans on a forum to get it placed at the bottom instead. Useful stuff, but I didn’t fancy doing HUD stuff tonight.
I fancied playing with that “fade” effect you often see in games. It’s apparently super useful when replacing whole screens to prevent glitchy behaviour. i.e. you fade it to a single colour, replace the screen content, and fade it back in. Looks cool, and hides quirks.
Let’s do that with a background.
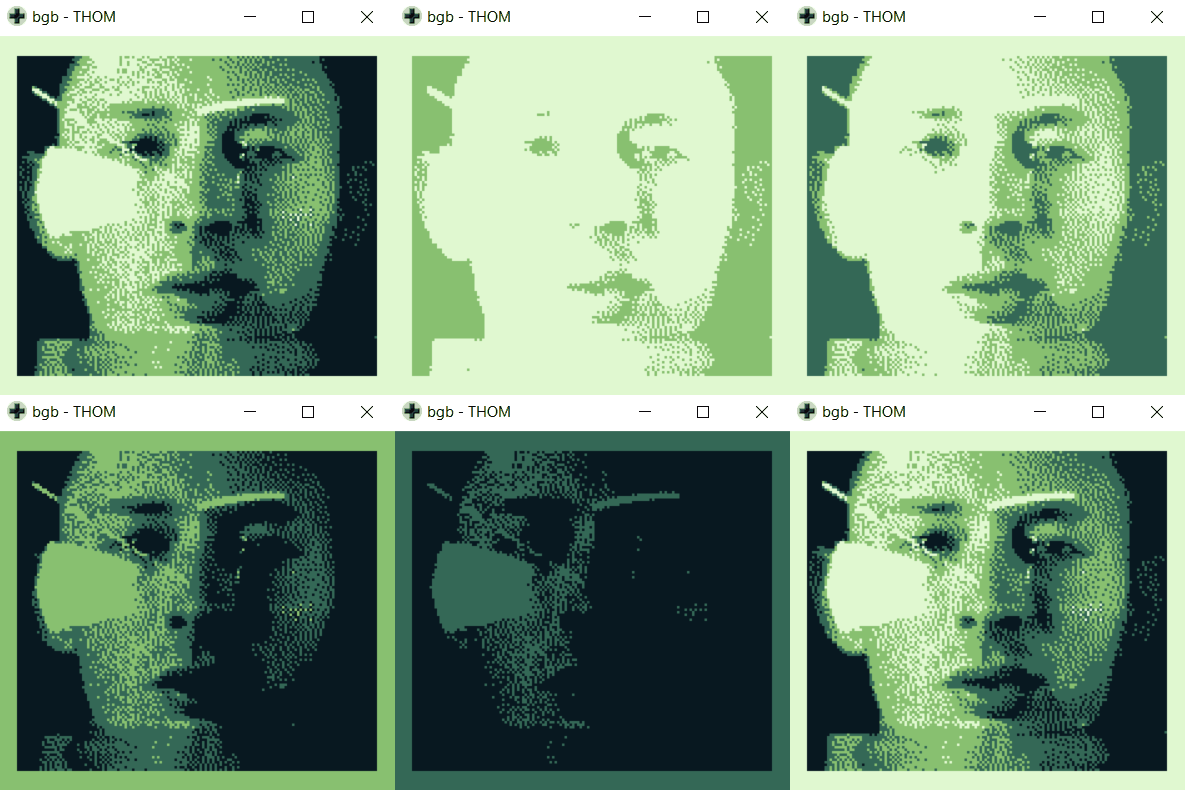
I need an image to play with, so I grabbed a picture of Thom Yorke from the “No Surprises” video (because who wouldn’t want a tiny Thom trying not to drown in their Game Boy?) and set about converting it to a useful format. In GIMP of all things.
So “The GIMP” has certainly moved on since I last used it (maybe 15 years ago?). At first I did so to follow a tutorial on displaying full screen images which failed when I found that there’s no way to get the pre-requisite pcx2gb.exe to run on my 64-bit Windows machine. Oh well. Still, the brief diversion into The GIMP did re-open my eyes to the concept of dithering (the colour palette trick) so I was able to process a nice image in the correct dimensions at a reduced palette.

Right, so getting it into a Game Boy format. Well pcx2gb didn’t work, but thanks to an old post and the Internet Archive (I’m sensing a theme here) I dug up a REALLY neat online tool for generating the tiles and the map! I should try and grab a copy before it goes away forever.
Paste that data into a .c file, write a super-basic loader and ta-da!

(Why the border? Well, the Game Boy has limits, and enough unique tiles to fill the whole screen is just too much. Giving it a 1-tile border allowed a single tile to be repeated all the way around, vastly reducing the number of unique tiles needed.)
Let’s make him fade.
As usual, it didn’t take long to find a great example. I’d already read up on the principles of how it’s done (palette swap each colour towards the lightest/darkest one) and some kind person calling themselves “cabbage” uploaded some sample code.
It didn’t take long to pull apart, reassemble, and integrate onto my little test project.

(Yes, I know that’s not this song)
(Yes, that’s why I thought of using Thom
Time Spent: About 1.5 hours. A lot of which was finding tools, installing GIMP and playing with Thom’s face.
Dude you made my day (night actually) with this post I’ve been looking for a pcx2gb alternative for AGES!