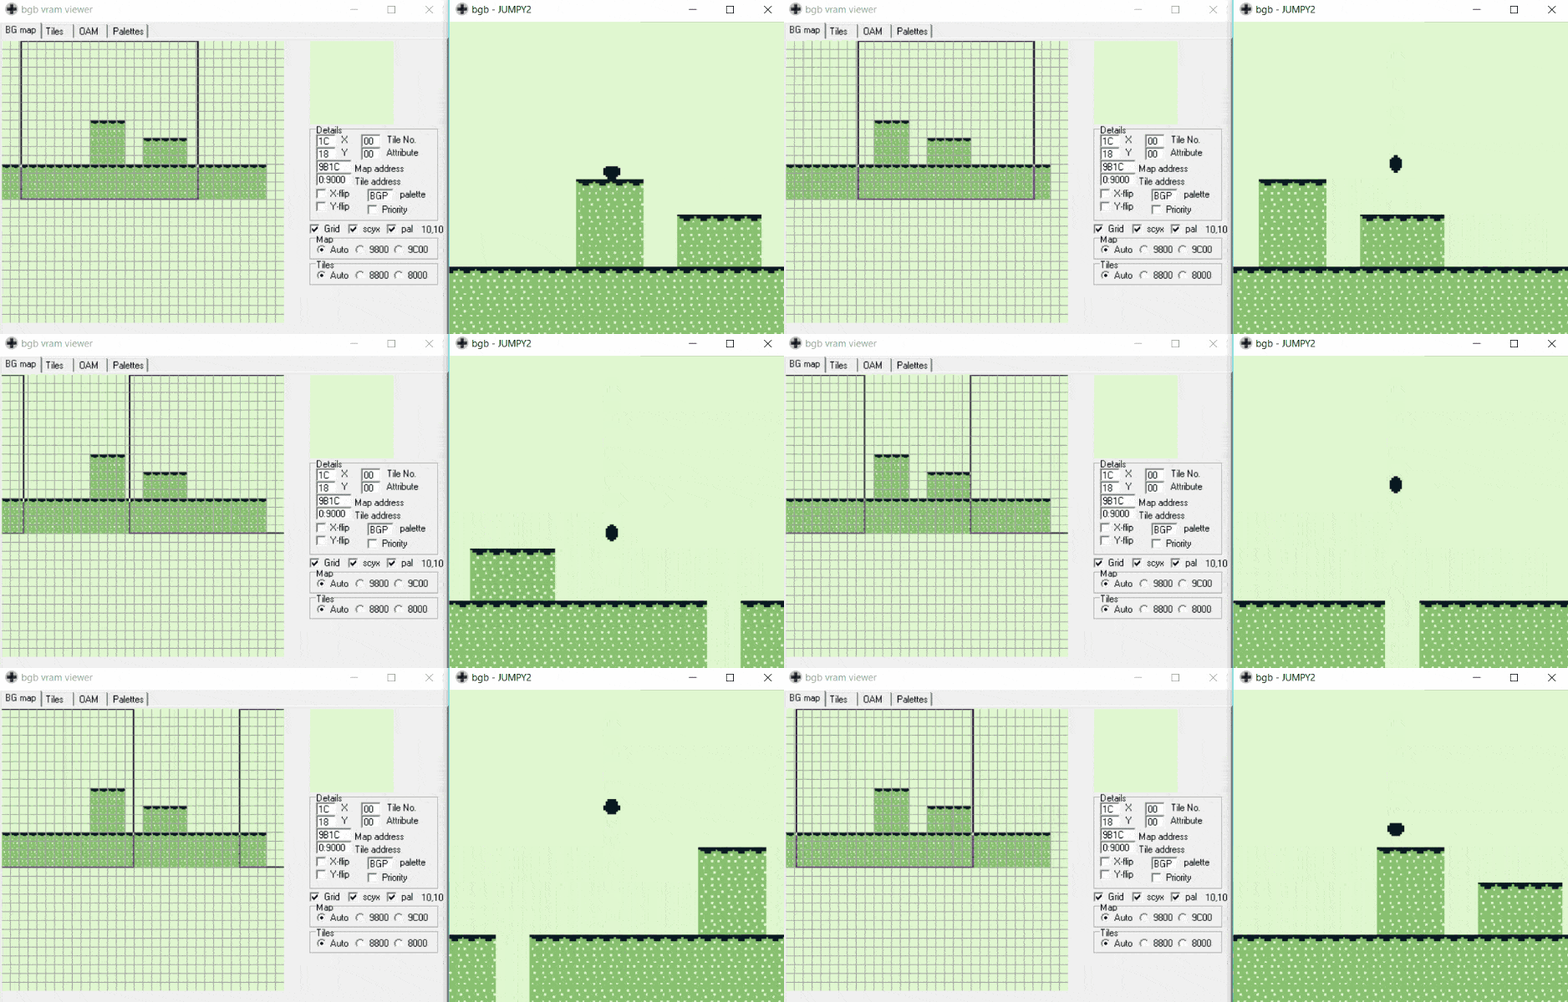
I’m going to come clean about Jumpy’s level (if anyone is actually playing the ROMs?). That clever looping behaviour isn’t specially coded – it’s just what the Game Boy does.
The Game Boy’s VRAM – the part of the memory keeping hold of all the graphics stuff – only actually holds a total width of 32 tiles for the background. If you try to scroll out beyond that it just loops back. Just like traversing the globe, go far enough in any directions and you’ll find yourself back where you were. Only it doesn’t take as long on an 8 KiB Game Boy.

Now, think of pretty much any scrolling platform game. Those courses are significantly longer than this little slice, and I wanted to figure how to do it.
(Once again, I didn’t set out to make a platform game, but pursuing these curious tangents is 90% the point of this project.)
The basic principle seems straightforward enough. Why would the Game Boy give you those extra “off screen” areas unless it expected you to do something with them?
There’s a certain amount loaded ahead of the player, so when that is pulled into view we can replace what has drifted off the other side of the screen with what is to come next. When the viewport loops around, it’ll show those new parts of the level and create the illusion of one long course.
When endlessly looping the same 32 columns of tiles, we were using the same map (generated by Gameboy Map Builder) in code to keep track of both the tiles we drew into the background layer to show the level graphics and to run our collision detection against to see if we’d hit the ground. It gets a little more complex when updating.
A tile map is stored as one long set of tiles, and rendered to screen by specifying the width of the area to fill. This value sets the bound where the single long line of values loops around and starts making new rows. The starting area is 32 columns wide (20 displayed and 12 off to the right) and 18 tall (actually also 32, but as we are only scrolling horizontally we can ignore the other 14 off-screen below). To fill the area we give it an array of 576 tile references and tell it to loop at position 32. This gives us a 32 x 18 background nicely rendered to screen.
Remember in the last post I said that I had done something that seemed to work fine even though it shouldn’t, but in reality it was playing merry hell with lots of subsequent, unrelated instructions? I initially made a map that was wider than 32 tiles. It rendered fine, cropping off the extra. “Oh well”, thought I, and left it. Then I lost my mind on unrelated bugs until I had that “aha” moment, explicitly created a 32×18 map, and all those other issues vanished.
When we do our collision detection we calculate where on this grid the sprite is (or is going to be) by dividing the x & y by 8 (the pixel-size of a tile). Then we can back-calculate it to find which of our 576 values this corresponds to: (32 * y) + x.
We’ve established that when a column of tiles leaves the left-hand side we want to replace it with the next column coming in from the right, so really we have two things to update: the display, and the collision detection map.
First issue: our level is stored as a big looping set of values creating rows, but we want to be appending new columns.
There’s a smart way of calculating the contents of that single column by doing a bit of maths on the big long list of values denoting the floor map. However, I couldn’t quite get C to play nicely. Also, if you can store something statically in an optimised way instead of calculating it each time that’s going to help the Game Boy’s diminutive hardware perform better anyway. So after that first set of 576, I actually store the rest of the level as an array of arrays, each being the contents of a column.
This makes rendering the new column very easy in GBDK. Just keep track of which columns have already been rendered and every time the screen scrolls 8 pixels (again, the width of a tile) render the next set into the right place.
The tricky bit becomes – how do we fix the collision detection? That thing is reading from a 576-tile map. We need to independently update that. This is where we need to calculate which of the VRAM’s 32 columns are updating and jump through the map in intervals of 32 to hit the correct 18 tiles. To illustrate, here’s my code to update the background and the map used for collision detection. The next_vram_location variable is the vram “column” we want to update, incrementing every 8 pixel scroll and looping back to position 0 whenever it hits 32.
set_bkg_tiles(next_vram_location, 0, 1, 18, floormap_full_segments[bkg_columns_scrolled]);
for (i = 0; i < 18; i = i + 1)
{
	floormap[(i * 32) + next_vram_location] = floormap_full_segments[bkg_columns_scrolled][i];
}
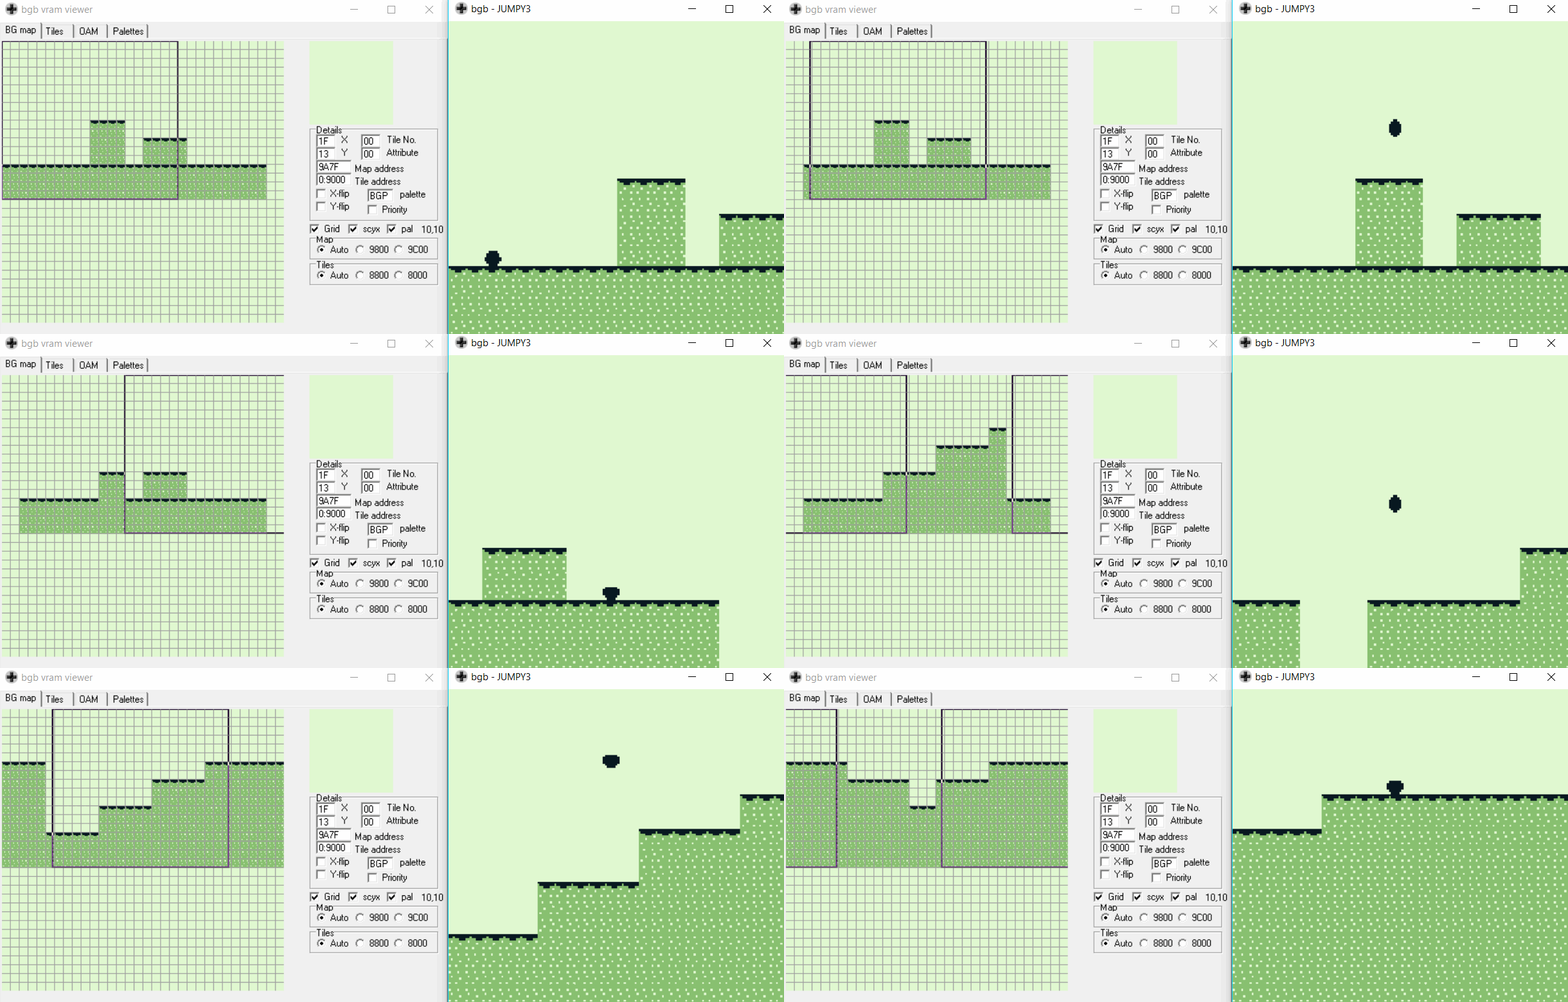
Here it is in action:

Having sorted that, I built a much bigger course and added a couple of other changes to go along with this: First, when all the tile columns have been rendered, it stops scrolling and you can jump all the way to (but not beyond) the right hand side of the screen.
Secondly, I removed the ability to scroll left.
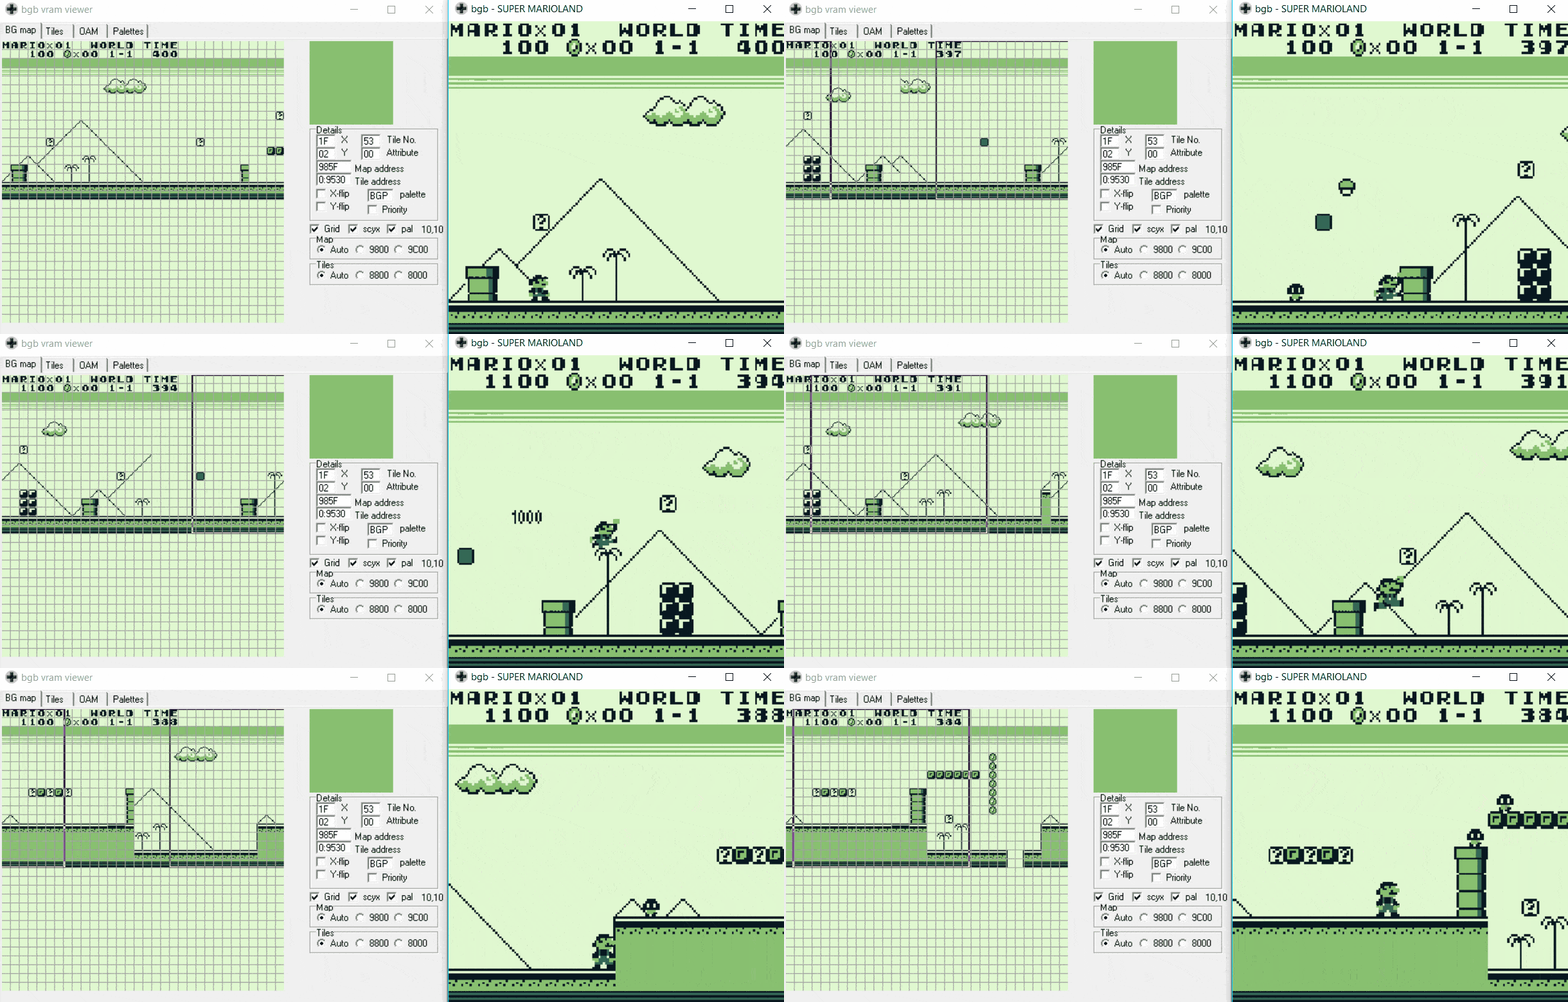
While it is entirely possible to run similar logic as above but “in reverse” to allow movement in both directions, I kept it simple and didn’t bother. And then it struck me; this is likely just the same reason as why you can’t go back in the early Super Mario games. So I took a look under the hood of a classic.

(Copyright Nintendo etc. etc. yes I own the original game thanks for asking)
Mario could never go home because it had been literally destroyed by the future.
Still, looks like Jumpy is on the right track.
Time Spent: It was glorious experimentation so I wasn’t really counting, but probably about 4 hours.